Understanding Drill Centering Guides
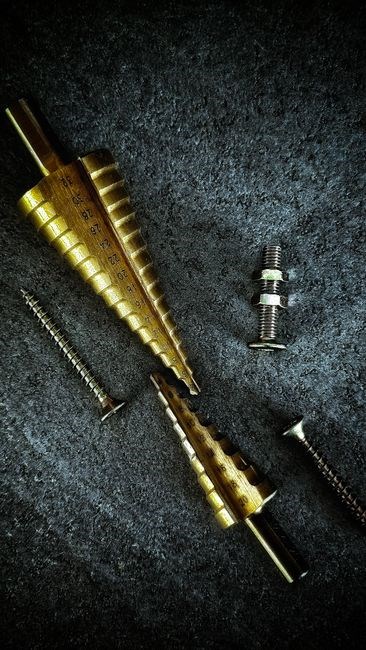
Drill centering guides keep a drill bit aligned, ensuring straight holes without a press. They clamp over a dimple or existing hole, using a hardened steel bushing or self‑centering pin to lock the bit in place for accurate pilot drilling. It stabilizes drill depth. Today
Definition and Purpose
Drill centering guides are precision jigs that lock a drill bit or driver in a fixed position relative to a workpiece, preventing lateral movement and ensuring that holes are drilled perfectly straight and at the exact intended location. These devices typically feature a hardened steel bushing or a self‑centering pin that fits into a pre‑drilled dimple, template, or existing hole. The guide is then clamped onto the material, and the drill bit is inserted into the bushing, which holds it rigidly in place. By eliminating hand‑drift and providing a stable reference point, centering guides allow users to achieve high accuracy with a hand drill, a power drill, or even a CNC machine during pilot drilling stages. The primary purpose is to increase repeatability, reduce the risk of mis‑aligned holes, and improve overall work quality, especially in woodworking, cabinetry, and metalworking applications where precise hole placement is critical. Modern guides, such as those from Kreg, Montana, and Jigarex, incorporate adjustable angles, quick‑change shanks, and magnetic tips to accommodate a wide range of bit sizes and drilling angles, making them versatile tools for both hobbyists and professionals. By using a centering guide, a user can drill through thick panels or complex assemblies with confidence that each hole will be centered and straight, thereby saving time and minimizing material waste. In practice, the guide’s bushing is often made of hardened steel to resist wear, and the pin may be spring‑loaded to maintain a firm grip on the template. Users can also adjust the angle of the guide from 0° to 60° to accommodate angled drilling tasks, providing flexibility for complex joinery or metal fabrication projects. When combined with a pilot drill, the centering guide ensures that the initial hole is perfectly aligned, which is essential before enlarging the hole with a larger bit. Regular maintenance, such as cleaning the bushing and lubricating the pin, keeps the guide functioning smoothly and extends its lifespan. Overall, a drill centering guide is an indispensable tool for anyone who demands precision and consistency in their drilling work. The concept of centering a drill bit dates back to early workshop practices, where craftsmen would use simple templates or carved pins to guide their tools. Modern guides have refined this idea with industrial materials and ergonomic designs, making the process faster and more reliable. For instance, the Kreg Drilling Guide offers six hardened steel drill guides ranging from 1/8 to 1/2 inch, allowing users to drill a variety of sizes with consistent accuracy. Meanwhile, the Jigarex self‑centering block features a thin textured rubber pad that ensures the guide stays in place once clamped, while the tethered centering pin fits tightly into the bushing, aiding in precise alignment. These features highlight how contemporary guides combine mechanical stability with user‑friendly adjustments, ensuring that even novice users can achieve professional results. By integrating a centering guide into their workflow, woodworkers, metalworkers, and hobbyists alike can reduce errors, improve efficiency, and produce high‑quality, repeatable holes across a wide range of materials and projects.
Common Types of Drill Centering Guides
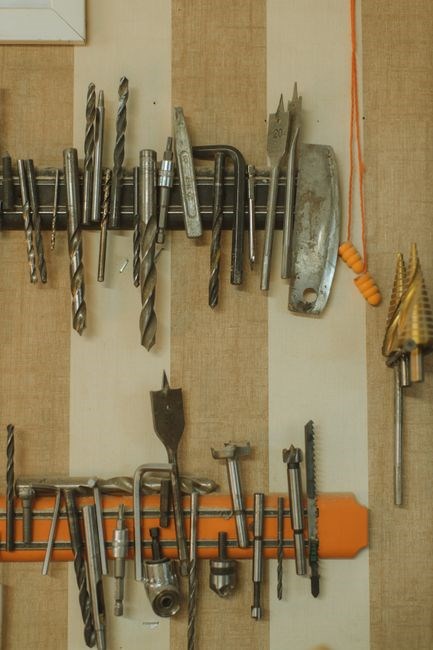
Fixed‑position guides (Kreg, Montana) lock a drill with a bushing for straight holes. Self‑centeringguides (Jigarex, Mounting Supplies) use a pin that snaps into a dimple or existing hole, enabling alignment and adjustment.
Fixed-Position Guides (Kreg, Montana)
Fixed‑position drill centering guides lock a drill bit in a single, unchanging location, providing a reliable reference point for straight drilling without a drill press. The Kreg Drilling Guide, for example, incorporates six hardened steel drill guides ranging from 1/8 to 1/2 inch. These guides hold the drill in place, preventing lateral movement and ensuring the bit remains perfectly vertical. The design features a sturdy base that can be clamped securely to the workpiece, and the guides are engineered to accommodate a variety of drill bit sizes. When the drill is inserted, the bit sits flush against the guide’s bushing, creating a stable platform that resists wobble during drilling. Montana’s self‑centered block, while often marketed as a self‑centered system, also offers a fixed‑position mode. By selecting the appropriate bushing size and tightening the clamp, the block can be used to hold the drill bit in a fixed orientation. The block’s base is equipped with a rubber pad that grips the work surface, reducing slippage. In both Kreg and Montana systems, the drill bit is positioned through a pre‑drilled hole or a dimple, and the guide’s bushing locks the bit in place. This method is especially useful for tasks that require multiple holes drilled at the same depth and angle, such as framing, cabinetry, or metal fabrication. The fixed‑position approach eliminates the need for complex alignment procedures, allowing users to focus on speed and accuracy. By using a fixed guide, the risk of mis‑drilling due to hand fatigue or uneven pressure is greatly reduced. The result is a consistent, repeatable drilling process that saves time and improves overall quality. For professionals and hobbyists alike, fixed‑position guides provide an efficient solution for straight, precise holes in a wide range of materials, from wood to metal. Because the guides are made from hardened steel, they resist wear and maintain dimensional stability over thousands of uses. The clamp mechanism is designed for quick release, allowing rapid setup and teardown. Users can adjust the depth stop on the drill to match the desired hole depth, ensuring uniformity across a batch. The combination of a rigid base, a secure clamp, and a precision bushing makes fixed‑position guides a staple in workshops that demand high precision and repeatability.
Self-Centering Guides (Jigarex, Mounting Supplies)
Self‑centering drill guides are designed to automatically align a drill bit over a pre‑drilled hole, dimple, or existing hole without the need for a fixed reference point. The Jigarex Self‑Centering Guide features a thin textured rubber pad on its base that grips the work surface once clamped, preventing slippage during drilling. A tethered centering pin fits tightly into the guide’s bushing, which matches the standard ski‑jig bushing size, ensuring compatibility with stepped drill bits. When the drill bit is inserted, the pin locks the bushing over the center punched dimple or existing hole, centering the bit precisely. This system is particularly useful for irregular surfaces or when a fixed‑position guide would be impractical. The guide’s modular design allows the user to switch between different bushing sizes, from 1/16 to 1/2 inch, making it versatile for a range of drilling tasks. The rubber pad’s texture provides additional stability, and the clamp holds the guide firmly in place, so the bit remains vertical throughout the drilling process. Because the guide is self‑centering, the user does not need to align a fixed reference point; the pin automatically positions the bushing over the target. This reduces setup time and improves accuracy, especially in tight or awkward spaces. The guide is compatible with both hand drills and power drills, and the self‑centered pin can be adjusted to accommodate slight variations in hole size. The Jigarex guide is engineered for durability, with hardened steel bushings that resist wear and maintain precision over repeated use. These guides enable precise drilling across materials, from hardwood to metal, improving high quality!!!
Choosing the Right Guide for Your Project
Choosing the right drill centering guide hinges on material, bushing size, and angle needs. For hardwood, a 1/8‑to‑1/2” hardened steel guide works; metal demands larger bushings. Adjustable‑angle models let you drill at 0‑60°, while fixed guides keep it simple. for precision. now!
When selecting a drill centering guide, the first consideration is the type of material you’ll be working with. Soft woods such as pine or poplar can be comfortably handled with a 1/8‑to‑1/4” hardened steel bushing, while denser hardwoods like oak or maple often require a 3/8‑to‑1/2” bushing to maintain stability during drilling. Metal applications, especially steel or aluminum, demand even larger bushings—typically 1/2” or larger—to counteract the higher torque and prevent bit wobble. The bushing’s inner diameter must match the drill bit’s shank size; a mismatch can cause slippage and inaccurate holes. Guide material—steel or aluminum—must match the workpiece properly. An aluminum guide is lighter, but a steel guide offers greater durability for thick panels. Manufacturers provide interchangeable bushings for various bit sizes. For instance, a 1/4” bit fits snugly in a matching bushing, but a 3/8” bit may drift. Always verify the guide’s specifications against the drill bit’s diameter, the material’s density, and the required depth of the hole. Proper alignment and a correctly sized bushing reduce the risk of misalignment, improve drilling speed, and extend the life of both the bit and the guide. By carefully matching the guide’s bushing size to the material and bit, you ensure consistent, straight holes and a smoother workflow. OK.
Angle Adjustment Features
Angle adjustment is a critical feature that allows a drill centering guide to accommodate a wide range of drilling angles, from the standard 90° to more complex 45° or even 60° positions. The most common mechanism is a pivoting arm or a rotating base that locks into place with a set screw or a cam system. For example, the Montana Brand Multi‑Angle Drill Guide offers an adjustable angle range from 0° to 60°, enabling users to drill at steep angles without compromising accuracy. This is achieved by an aluminum frame that houses a 1/4‑inch hex shank, allowing the guide to be repositioned easily. The pin remains fixed relative to the bushing, ensuring that the drill bit stays centered even when the guide is angled. Some guides, such as the Jigarex Self‑Centering Drill Block, feature a rubber pad on the base to prevent slipping during angle adjustments. The pad’s texture provides friction, a!! keeping the guide stable while the angle is being set. Angle adjustment also improves ergonomics; by allowing the drill to be positioned at a more comfortable angle, it reduces wrist strain and increases control. The adjustment mechanism is typically designed to be lockable, so once the desired angle is set, the guide will not shift during drilling. This lock‑in feature is essential for maintaining precision, when drilling holes or working on curved surfaces. The combination of a sturdy pivot, secure locking, and a self‑centered bushing makes angle adjustment a reliable feature for professionals and hobbyists alike, ensuring straight, accurate holes at any required angle.
Installation and Operation Techniques
Secure the guide with clamps, align the pin to a dimple or existing hole, then pilot drill to set the center. Use a hand drill or power drill keeping the guide steady. After drilling, remove clamps and check alignment before proceeding.
Securing the Guide with Clamps
When installing a drill centering guide, the first step is to position the guide block so its bushing sits flush against the workpiece. For fixed‑position guides such as Kreg or Montana, a small rubber pad on the base keeps the block from sliding. Place a C‑clamp or bar clamp over the guide’s mounting plate and tighten until the pad is firmly pressed against the surface. For self‑centering guides like Jigarex, the tethered pin must be aligned with a pre‑punched dimple or existing hole before clamping; a light squeeze of the clamp will hold the pin in place without compressing the rubber. It is crucial to avoid overtightening, which can deform the bushing or shift the guide’s angle. A good practice is to tighten in small increments, checking the alignment after each adjustment. If the guide has an adjustable angle slot, secure the angle with a lock screw before clamping. After the guide is locked, double‑check that the drill bit sits centered in the bushing by lightly tapping the bit with a hammer; a centered bit will produce a clean, straight hole. Finally, keep the clamp’s jaws clean of debris to maintain a consistent grip during drilling. Proper clamp placement and tension ensure the guide remains stable, preventing wobble and allowing the drill to stay perfectly vertical throughout the operation. If you are working on a large panel, consider using a bench vise to hold the workpiece while the guide is clamped; this reduces the load on the clamp and keeps the guide level. For maximum precision, use a torque‑controlled clamp or a spring‑loaded C‑clamp that delivers consistent pressure.
Aligning the Centering Pin to a Dimple or Existing Hole
First, identify a clean, flat spot on the workpiece that will serve as the reference point. For a dimple, the indentation should be deep enough to accept the guide’s pin without slipping. If using an existing hole, ensure it is centered and free of burrs; a sharp edge can push the pin off‑center. Place the guide block so that its bushing is positioned over the chosen spot. Gently insert the centering pin into the bushing, allowing the pin to slide until it rests against the dimple or hole rim. The pin should fit snugly; any play will translate into a mis‑aligned hole. Use a small mallet or a rubber hammer to tap the pin lightly, ensuring it is fully seated. If the pin does not sit flush, adjust the guide’s angle or reposition the block until the pin aligns perfectly with the reference. Once the pin is centered, lock the guide’s angle adjustment screw (if available) to lock the orientation. For self‑centering designs, the tethered pin will automatically align itself during this step; simply verify that the pin’s axis is perpendicular to the workpiece surface. After alignment, apply a light clamp to hold the guide in place, but avoid overtightening which could shift the pin. Finally, perform a test drill with a small pilot bit to confirm that the bit follows the pin’s axis, producing a straight, centered hole. If the pilot deviates, re‑check alignment and clamp pressure before proceeding!!!
Pilot Drilling for Accuracy
Before drilling the final hole, a small pilot hole is essential for precision. The guide’s bushing holds the drill bit in a fixed position, but the pilot step ensures the bit’s axis remains true to the desired center. Start by selecting a pilot bit that is 1/4 to 1/3 the size of the final bit; this reduces the chance of the bit wandering as it engages the material. Clamp the guide to the workpiece firmly, making sure the centering pin is aligned with the reference dimple or existing hole. Set the drill to a low speed to avoid excessive heat, which can warp the material or the guide. Insert the pilot bit into the drill’s chuck, then position the drill tip just above the surface. Apply steady pressure and allow the bit to bite into the material. Once the pilot hole is established, remove the drill and inspect the hole’s depth and alignment. A properly placed pilot will be straight and centered, confirming that the guide’s pin is correctly positioned. If the pilot deviates, readjust the guide’s angle or reposition the pin. After confirming accuracy, replace the pilot bit with the final drill bit of the required diameter. The final drilling will now follow the established axis, producing a clean, straight hole with slight wobble. This two‑step approach—pilot followed by final drilling—mirrors practices used in CNC machining and drill presses, ensuring the highest level of precision hobbyist professional projects.
Maintenance and Troubleshooting
Keep bushings clean by wiping with a dry cloth, then apply a light coat of oil. Inspect for wear; replace worn bushings to avoid drift. Common errors include loose clamps, misaligned pins, or using wrong bit size. Tighten clamps and verify alignment before each use. Thanks!.
Cleaning and Lubrication of Bushings
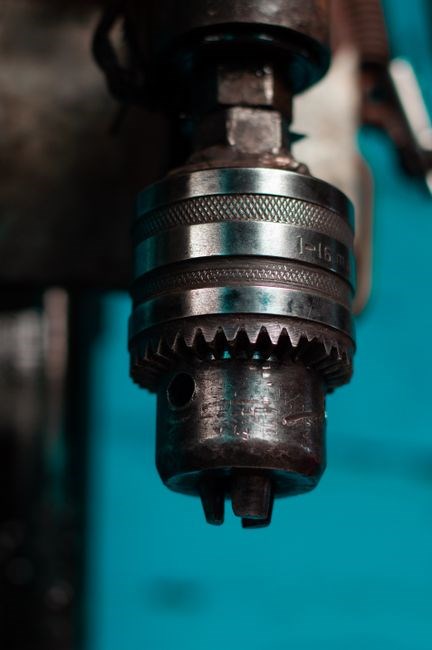
After each use, remove the guide from the workpiece and inspect the hardened steel bushing for debris, burrs, or wear. Wipe the bushing with a dry, lint‑free cloth to remove dust and metal shavings that can cause friction or mis‑alignment. If the bushing shows signs of oxidation or a dry, gritty surface, a thin coat of high temp machine oil or a light spray of penetrating oil will restore smooth contact and reduce wear. Apply the lubricant sparingly; excess oil can attract dust and compromise the guide’s ability to hold the drill bit firmly. After lubrication, re‑assemble the guide, ensuring the centering pin sits snugly in the bushing and that the clamp is tightened to the manufacturer’s recommended torque. Periodically check the bushing’s integrity: a worn or cracked bushing will lead to wobble, inaccurate holes, and potential damage to the drill bit. Replace any bushing that shows visible wear or a compromised surface. Maintaining clean, lubricated bushings extends the life of the guide, preserves drilling accuracy, and keeps the tool ready for the next project. Proper care also helps prevent the build‑up of debris that can interfere with the guide’s self‑centering mechanism, ensuring each hole is drilled straight and true. Keep this routine for flawless results.!! Regular maintenance ensures each guide performs at peak precision.!!!
Common Errors and How to Fix Them
One frequent mistake is mis‑aligning the centering pin before clamping; the pin must sit flush with the bushing’s inner diameter. If it is offset, the drill bit will wobble, producing a crooked hole. To correct, loosen the clamp, reposition the pin, and re‑tighten until the pin is centered. Another issue is over‑tightening the clamp, which can distort the bushing or compress the rubber pad, causing the guide to shift during drilling. Use a torque wrench or the manufacturer’s torque spec to avoid this. A third error is neglecting to pilot drill before the final bit; starting a full‑size bit on a rough edge often leads to a mis‑centered hole. Always drill a small pilot hole first, then switch to the final bit. Check the bushing’s inner diameter against the bit’s shank; if the fit is tight, swap to a smaller bit or a bushing with a larger clearance. Finally, failing to clean the bushing can leave abrasive particles that create drag. Clean the bushing with a soft brush and a mild solvent, then dry thoroughly before re‑assembly. By addressing these common pitfalls—pin mis‑alignment, clamp over‑tightening, skipping pilot drilling, improper bit size, and dirty bushings—you’ll ensure each hole is drilled straight, true, and repeatable. Check the bushing’s clearance before each drill to avoid wobble a.