
Welcome to the Honeywell 6000 Series Installation Manual! This guide provides a comprehensive overview of installing and configuring your FocusPRO 6000 Series programmable thermostat. Designed for ease of use and energy efficiency, this thermostat offers advanced features to optimize your heating and cooling systems. Follow this manual to ensure proper installation and setup for optimal performance.
1.1 Product Overview
The Honeywell 6000 Series is a line of programmable digital thermostats designed for efficient temperature control in residential and light commercial settings. These thermostats are part of the FocusPRO series, offering user-friendly interfaces and advanced features like programmable schedules, energy-saving modes, and compatibility with various HVAC systems. Models such as the TH6110D, TH6220D, and TH6320U provide flexible solutions for 1 Heat/1 Cool to 2 Heat/2 Cool systems. With features like compressor protection and battery replacement alerts, the Honeywell 6000 Series ensures reliable performance and energy efficiency, making it a popular choice for modern heating and cooling needs.
1.2 Key Features of Honeywell 6000 Series
The Honeywell 6000 Series offers a range of innovative features, including programmable scheduling, energy-saving modes, and built-in compressor protection. These thermostats support Wi-Fi connectivity for remote control via smartphones and tablets. They also feature a sleek, user-friendly interface with a backlit display and touch controls. The series includes models compatible with multiple heating and cooling stages, ensuring flexibility for various HVAC systems. Additional features like automatic temperature hold, low battery alerts, and energy usage reports further enhance their functionality, making the Honeywell 6000 Series a versatile and efficient solution for temperature management.
System Components and Compatibility
The Honeywell 6000 Series includes essential components like the wallplate, thermostat, and wiring harness. It is compatible with various HVAC systems, supporting up to 2 Heat/2 Cool stages.
2.1 Models Covered in the Manual
This manual covers the installation and setup of Honeywell FocusPRO 6000 Series models, including TH6110D, TH6220D, and TH6320U. These models support various HVAC configurations, such as 1 Heat/1 Cool, 2 Heat/2 Cool, and heat pump systems. Each model is designed for compatibility with standard heating and cooling systems, ensuring reliable performance across different setups. The manual provides detailed instructions tailored to each model’s specifications, ensuring a seamless installation process. Refer to the model number on your thermostat to confirm compatibility and follow the corresponding guidelines.
2.2 Compatibility with Heating and Cooling Systems
The Honeywell FocusPRO 6000 Series is compatible with a variety of heating and cooling systems, including 1 Heat/1 Cool, 2 Heat/2 Cool, and heat pump configurations. It supports standard HVAC systems such as gas furnaces, heat pumps, and air conditioning units. Compatibility ensures optimal performance and energy efficiency. Always verify system compatibility before installation to avoid potential damage or operational issues. Proper setup guarantees reliable operation across different configurations. This thermostat is designed to integrate seamlessly with most modern heating and cooling systems, providing precise temperature control and energy savings.
Pre-Installation Requirements
Before installing the Honeywell 6000 Series thermostat, ensure the power to your HVAC system is turned off. Gather all necessary tools and materials, and verify system compatibility. Prepare the installation area to avoid damage or interference during the process.
3.1 Safety Precautions
Before starting the installation, ensure the power to your HVAC system is turned off at the circuit breaker or fuse box. Verify the system is cool or warm to avoid burns. Wear protective gloves and eyewear to prevent injury from sharp objects or debris. Avoid touching electrical components with bare hands to prevent shock. Ensure the area is well-ventilated and free from flammable materials. Follow all local electrical codes and regulations. If unsure, consult a licensed electrician. Always refer to the manufacturer’s guidelines to ensure safe and proper installation.
3.2 Tools and Materials Needed
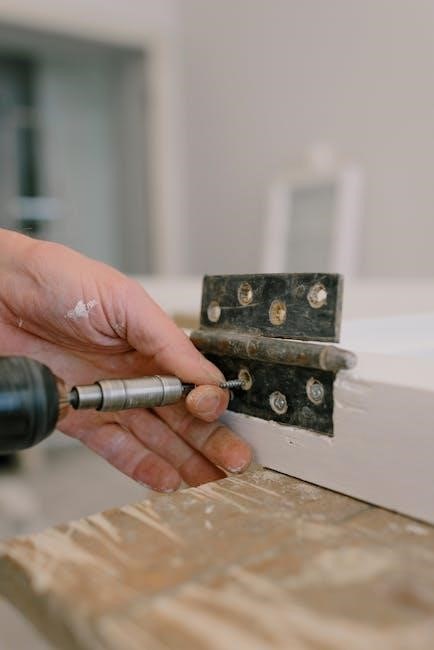
To successfully install your Honeywell 6000 Series thermostat, gather the following tools and materials: a screwdriver (flathead and Phillips), pliers, wire strippers, a drill with bits, wall anchors, screws, and adhesive wall strips. Ensure you have a voltage tester to confirm power is off. Additional materials may include a level, pencil, and masking tape for precise mounting. Refer to the packaging for any specific components provided, such as wallplates or adapters. Having these tools ready will streamline the installation process and ensure a secure, professional-grade setup.

Installation Steps
Install the Honeywell 6000 Series thermostat by following these key steps: mount the wallplate, attach the thermostat, connect wires carefully, and perform final system checks. Ensure all connections are secure and follow the manual’s instructions for a safe and proper setup.
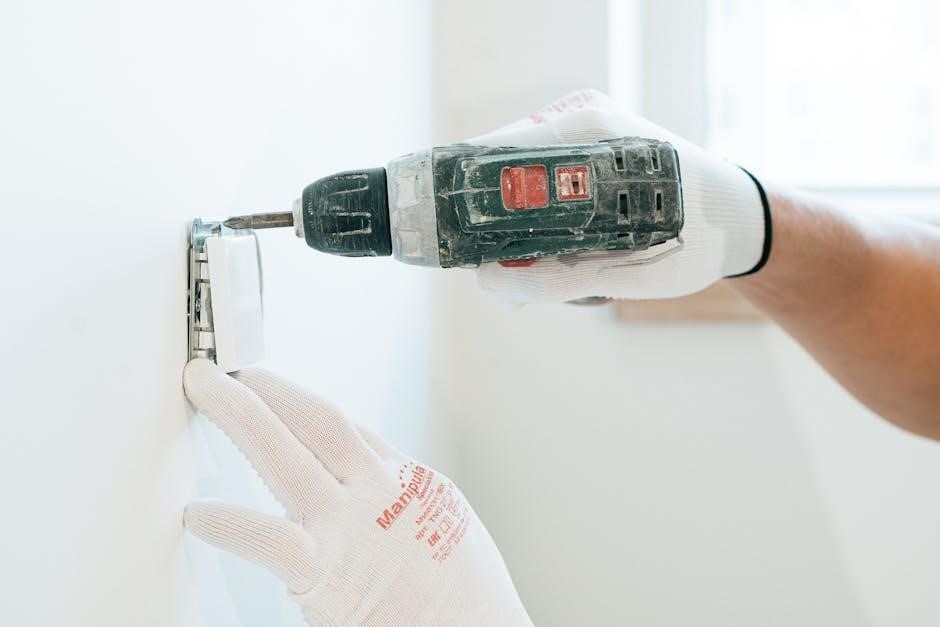
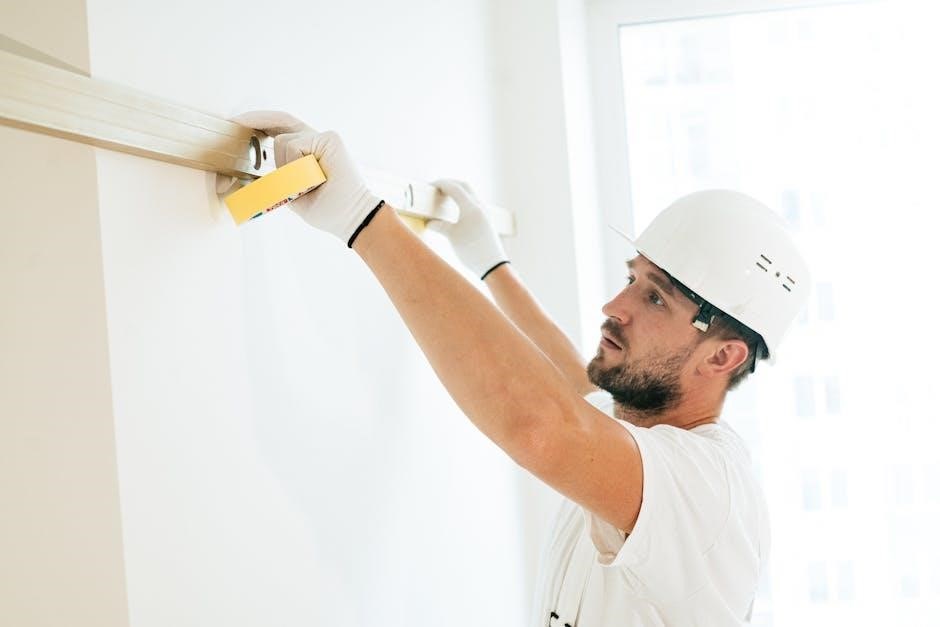
4.1 Wallplate Installation
Begin by installing the wallplate, ensuring it is level and securely mounted. Remove the battery holder and gently pull the wallplate away from the thermostat. If necessary, drill holes and use wall anchors to mount the wallplate on the wall. Align the wallplate with the screws provided and tighten them firmly. Ensure the wallplate is flush against the wall for a proper fit. Once installed, reattach the thermostat to the wallplate by aligning the mounting pins and pressing gently until it clicks into place. Double-check that the wallplate is level and secure before proceeding to the next steps.
4.2 Thermostat Mounting
Mount the thermostat to the wallplate by aligning the mounting pins on the back of the thermostat with the corresponding slots on the wallplate. Gently press the thermostat onto the wallplate until it clicks into place. Ensure the thermostat is level and securely attached. If necessary, adjust the alignment to achieve a flush fit. Once mounted, check that all buttons and controls are accessible and functioning properly. Do not connect the wires at this stage; proceed to the wiring connections section for further instructions. Ensure the thermostat is firmly seated to avoid any operational issues.
4.3 Wiring Connections
Connect the wires to the appropriate terminals on the thermostat, following the wiring diagram provided in the manual. Ensure the system type (heat pump, gas, or electric) matches the thermostat settings. Verify compatibility with your HVAC system before making connections. Secure all wires tightly to prevent loose connections. After wiring, turn the power back on and test the system to ensure proper operation. Refer to the troubleshooting section if issues arise. Always follow safety guidelines to avoid electrical hazards during this process.
4.4 Final Installation Checks
After completing the wiring and thermostat mounting, restore power to the system and test all functions. Ensure the display screen lights up and shows the correct temperature. Verify that the thermostat is controlling the HVAC system properly, checking for heating, cooling, and fan operations. Confirm that all programmed settings and schedules are functioning as expected. Check for any error messages or unusual behavior. Ensure the thermostat is securely mounted and all wires are tightly connected. Finally, review the installation to confirm compliance with safety standards and manufacturer guidelines. This step ensures your system operates efficiently and safely.

Programming the Thermostat
Programming the Honeywell 6000 Series thermostat allows you to customize temperature settings for different times of the day. Set schedules to optimize energy usage and comfort. Use the HOLD feature to override programmed settings temporarily. The built-in compressor protection prevents rapid restarts, safeguarding your HVAC system. Ensure the display shows correct indicators like “Cool On” or “Heat On” for system status. Regularly check and replace batteries to maintain functionality. Follow the manual’s guidelines for troubleshooting and ensuring all settings are correctly configured for efficient operation.
5.1 Setting Up Program Schedules
To set up program schedules on your Honeywell 6000 Series thermostat, press the SET button to access the scheduling menu. Choose between weekday and weekend programs or customize individual days. Select the Wake time for weekdays and set the desired temperature. Use the NEXT button to move through time periods and adjust temperatures as needed. For weekends, follow the same process but ensure settings are tailored to your lifestyle. Press HOLD to override schedules temporarily. Always review and save your settings to ensure they take effect. This feature helps optimize energy usage while maintaining comfort.
5.2 Overriding Program Settings
To override program settings on your Honeywell 6000 Series thermostat, press and hold the HOLD button. This action temporarily adjusts the temperature without altering the programmed schedule. The display will show both the current and overridden temperatures, ensuring you can easily monitor changes. The override remains active until you press HOLD again or the next scheduled period begins, allowing for flexible temperature control without disrupting your programmed settings. This feature is ideal for occasional adjustments, maintaining comfort while preserving your energy-efficient schedule.
5.3 Built-In Compressor Protection
The Honeywell 6000 Series thermostat features built-in compressor protection to prevent damage from short-cycling. This feature ensures the compressor waits a minimum of 5 minutes before restarting after shutdown. During this period, the display flashes “Cool On” or “Heat On” to indicate the delay. This protection is crucial for maintaining the longevity and efficiency of your HVAC system. The thermostat automatically enables this feature, providing peace of mind and reducing the risk of compressor failure due to rapid cycling. Always allow the system to complete this cycle to ensure optimal performance and reliability.
Advanced Features
The Honeywell 6000 Series offers advanced features like Wi-Fi connectivity, energy-saving modes, and remote control configuration, enhancing convenience and efficiency for smart home integration and optimal performance.
6.1 Wi-Fi Connectivity Setup
To set up Wi-Fi connectivity for your Honeywell 6000 Series thermostat, ensure your device is compatible and follow these steps. First, power on the thermostat and navigate to the Wi-Fi settings menu. Select your home network from the list of available options and enter the password using the touchscreen interface. Once connected, download and install the Honeywell Home app to control your thermostat remotely. The app allows you to adjust temperatures, view energy usage, and receive system alerts. If connection issues arise, restart the thermostat and router, or consult the troubleshooting guide for assistance.
6.2 Energy-Saving Modes
The Honeywell 6000 Series offers advanced energy-saving modes to optimize your heating and cooling usage. The programmable thermostat allows you to create schedules that automatically adjust temperatures during peak energy times. Energy-saving mode reduces consumption by slightly adjusting the setpoint, while smart recovery learns your system’s needs to cool or heat efficiently. Use the built-in energy reports to track usage and identify savings opportunities. For maximum efficiency, set higher temperatures when cooling and lower when heating during off-peak hours. These modes ensure your system runs efficiently without compromising comfort.
6.3 Remote Control Configuration
The Honeywell 6000 Series supports remote control setup for convenient temperature management. Pair the wireless remote with your thermostat by following the pairing button instructions in the manual. Ensure the remote is within range and the thermostat’s built-in receptor is unobstructed. The remote allows you to adjust settings, view the display, and bypass schedules. Use the remote to access advanced features like energy-saving modes or compressor protection. For security, the remote uses encrypted signals to prevent unauthorized access. Replace remote batteries annually for consistent performance. This feature enhances flexibility and comfort in controlling your HVAC system.
Maintenance and Troubleshooting
Regular maintenance ensures optimal performance. Check for common issues like blank displays or system malfunctions. Clean the thermostat and replace batteries annually. Reset if necessary.
7.1 Battery Replacement
To maintain your Honeywell 6000 Series thermostat, replace the batteries annually. Press and pull the battery holder to remove it. Use AA alkaline batteries for optimal performance. Ensure the thermostat is turned off before replacing batteries. If the display shows a low battery warning, replace the batteries promptly to avoid system interruptions. After installation, verify the thermostat functions correctly. Proper battery maintenance ensures reliable temperature control and prevents unnecessary system shutdowns.
7.2 Common Issues and Solutions
If your Honeywell 6000 Series thermostat experiences issues, start with basic troubleshooting. A blank display may indicate a power outage or tripped circuit breaker. Check the breaker and ensure the HVAC system’s power switch is on. For temperature inaccuracies, verify the thermostat’s calibration and ensure proper wiring connections. If the system fails to heat or cool, check the furnace door and ensure it is securely closed. For persistent issues, refer to the troubleshooting section or contact Honeywell Customer Care at 1-800-468-1502 for assistance.
7.3 Resetting the Thermostat
To reset your Honeywell 6000 Series thermostat, press and hold the HOLD button for 5 seconds. This will override any programmed settings and revert to the default temperature. For a full factory reset, remove the batteries, press and hold the HOLD button for 10 seconds, then reinstall the batteries. This process will clear all programmed schedules and settings. After resetting, ensure the thermostat is properly configured and test its functionality. If issues persist, contact Honeywell Customer Care for further assistance or refer to the troubleshooting section in the manual.
Warranty and Customer Support
Honeywell offers a 5-year limited warranty for the 6000 Series, covering defects in materials and workmanship. For assistance, visit yourhome.honeywell.com or call 1-800-468-1502.
8.1 Warranty Coverage
The Honeywell 6000 Series is backed by a 5-year limited warranty, covering manufacturing defects and material issues. This warranty applies to the thermostat and excludes batteries. It does not cover removal or reinstallation costs. For warranty claims, contact Honeywell Customer Care at 1-800-468-1502 or visit yourhome.honeywell.com. Proof of purchase is required. Damage caused by misuse or improper installation is not covered under this warranty.
8.2 Contacting Honeywell Customer Care
For assistance with your Honeywell 6000 Series thermostat, contact Honeywell Customer Care toll-free at 1-800-468-1502. Visit their official website at yourhome.honeywell.com for troubleshooting guides, manuals, and support resources. Representatives are available to address installation, operation, or warranty-related inquiries. Ensure you have your model number and purchase details ready when reaching out for efficient service.
With the Honeywell 6000 Series Installation Manual, you’ve successfully installed and configured your programmable thermostat. This guide has provided step-by-step instructions to ensure optimal performance, energy efficiency, and comfort. For future adjustments or troubleshooting, refer back to the manual or visit yourhome.honeywell.com. If further assistance is needed, contact Honeywell Customer Care at 1-800-468-1502. Remember to review warranty conditions for coverage details. Enjoy your enhanced home climate control with the Honeywell 6000 Series thermostat!